YES. so i finished my SAT course on saturday and i am SO ready to bake/cook like crazy for the next two weeks.
so last weekend, during the break between my first and second week doing the sat prep course, i watched some old sorted videos during a work break and developed a craving for creme brulee. and for those of you who know me personally, i'm a tea fanatic (some people have told me i look like a tea person. please. take a look at my profile picture on the right hand side bar of the main page of this site and tell me in the comments- do i look like a tea person?)
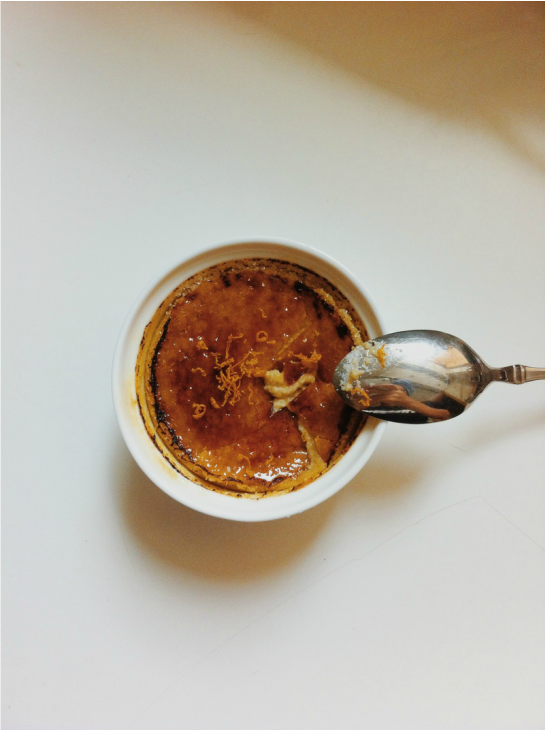
needless to say, it's summer, and just plain vanilla wouldn't do it for me. so in order to kick it up a notch, i started looking around for inspiration, and decided that i wanted to try out a citrusy, spiced creme brulee. at the same time, i also wanted to use up some of my tea bags from my tea collection. so i settled on what would satisfy all these cravings at once- earl grey and orange clove creme brulee :D (about the title- london fog is essentially an earl grey tea latte [if you haven't tried one, you should] and since the custard was creme anyway...london fog. or call it orange clove earl grey creme brulee if you want. call it whatever you want.)
now, this recipe actually took me two tries- the first time i made it, the custard was a bit took sweet for my family's and my liking. in addition, i just couldn't brulee the tops of the desserts without burning the sugar into black puddles of bubbling syrup. whoops.
so last weekend, during the break between my first and second week doing the sat prep course, i watched some old sorted videos during a work break and developed a craving for creme brulee. and for those of you who know me personally, i'm a tea fanatic (some people have told me i look like a tea person. please. take a look at my profile picture on the right hand side bar of the main page of this site and tell me in the comments- do i look like a tea person?)
needless to say, it's summer, and just plain vanilla wouldn't do it for me. so in order to kick it up a notch, i started looking around for inspiration, and decided that i wanted to try out a citrusy, spiced creme brulee. at the same time, i also wanted to use up some of my tea bags from my tea collection. so i settled on what would satisfy all these cravings at once- earl grey and orange clove creme brulee :D (about the title- london fog is essentially an earl grey tea latte [if you haven't tried one, you should] and since the custard was creme anyway...london fog. or call it orange clove earl grey creme brulee if you want. call it whatever you want.)
now, this recipe actually took me two tries- the first time i made it, the custard was a bit took sweet for my family's and my liking. in addition, i just couldn't brulee the tops of the desserts without burning the sugar into black puddles of bubbling syrup. whoops.

the first time 'round, i actually didn't add the orange. and although the spices and the tea certainly gave the custard a seriously amazing aroma and a warm, cinnamon-y, clove-y earl grey-y taste, it lacked the citrusy kick i was looking for. plus, the excessive sweetness of the custard overshadowed the otherwise should-have-been-spotlighted spices. slightly disappointed, especially since i accidentally whisked in too much air into the custard before i baked it. whoops.
when you zest oranges to add to your custard, make sure you DON'T GET ANY OF THE WHITE LAYER IN YOUR ZEST. you only want the orange layer; the white stuff will make it bitter and gross. remember that zest is only the thin, colored layer of the citrus fruit; it contains a lot of flavor.
but seriously. strain that boiled cream and spices mixture like your life depends on it. pour it through an extra-fine sieve twice if you're in a hurry. 5 times if you have sometime on your hands. 20+ if you just seriously have no life. or just nothing to do. (okay, i'm kidding; 5 is sufficient as long as you clear your sieve every time you pass the cream through) the reason for straining it so many times is because the custard of the creme brulee is traditionally completely smooth and free of any bits that could possibly be felt on the tongue. it's a melt-in-your-mouth dessert behind the copper glass wall of caramelized sugar and IT SHOULD REMAIN SO. unless you really do want to add some other stuff. but seriously, i doubt y'all want to have tea leaves in the bottom of your creme brulee. the first time i made this, the tea bags burst while int he simmering cream, and although i sifted twice, it didn't completely clear out, and the debris i was left with sank to the bottom of my custards when they baked. needless to say, the bottom was really, really flavorful- and not really what i wanted. i wanted the flavor to be well distributed and even. if you have a tea leave holder, i would definitely recommend putting your tea bags IN those. yes. the whole tea bag. this way, they won't burst. also, straining the cream would rid it of the orange zest so that your custards will be completely smooth. in addition, remember not to beat so much air into your egg yolks and sugar; your custards don't need the air bubbles. if you put too much air into it, let them sit in the bowl for a bit, occasionally stirring slowly, about once around the bowl, to get the air bubbles out. let them sit until you cannot see any bubbles, and then add the cream. also, the cream should be only slightly warm at most; around kid's temperature. any hotter than that and your eggs will cook in the cream before you even bake them :(
moving on to the baking of the cremes. creme brulees are baked in waterbaths, as the steaming water around the ramekins will keep the eggs from cooking through as quickly; it keeps your custard moist and prevents the sides of them to overcook into scrambled egg. (ew) essentially, a waterbath is a pan lined with a tea towel, then filled about half way to boiling water. inside the pan, before you pour in your hot water, you place your ramekins and fill them to the edge before the lip, and then pour enough hot water til it reaches about halfway up the ramekins and the pan. (see the picture below for reference.)

waterbath baking typically take longer, as the heat of the oven is forced to take it's time in heating the custards. it also ensures that the tops of the custards will set first, and that all rising will be done from the sides, forcing the custard to rise with a flat top. your custards are done when they're set. they should wiggle a bit when nudges, but your centers should be pudding-like, not liquid.
caramelizing the sugar was the hardest part for me. some tips for beginners; if you don't have a blowtorch, you can still make the brulee part of the creme brulee, albeit no flame involved. sorted has an amazing tutorial for this; check it out here. (or see click the link enclosed at the bottom of this post for the full video from start to finish) on the other hand, for those of you who DO own a blowtorch, please make sure you know how to use it first. essentially, when you're caramelizing sugar with direct heat, you want a small flame, aimed at the sugar, but at least 6in away. seriously. the closer your flame is, the easier it is for your sugar to turn black, which makes it bitter. what you want to do is to aim it at the sugar so that it melts and starts to form light golden beads, which will spread out a bit. make sure everything is heated so that the entire surface is covered and doesn't have any gaps showing, and try to avoid turning anything black. let the sugar harden into the signature caramel glass wall of creme brulees.
if you're hosting a large dinner party, you can make the custards up to two days ahead as long as you keep it in the fridge. just caramelize them about 10 minutes before serving, and viola!- impressive dessert. you're welcome.
recipe after the jump :)
Ingredients5 egg yolks 400ml cream 70g sugar 5 earl grey tea bags (strings pulled out) 1 small cinnamon stick 2 pinches ground cloves a pinch of nutmeg a pinch of cinnamon zest of one orange more granulated sugar to top with and caramelize | Ready to cook?
|
Original recipe from The Wanderlust Kitchen. Click here for to check it out.
And as promised, the full video from start to finish by Sorted.
And as promised, the full video from start to finish by Sorted.

 RSS Feed